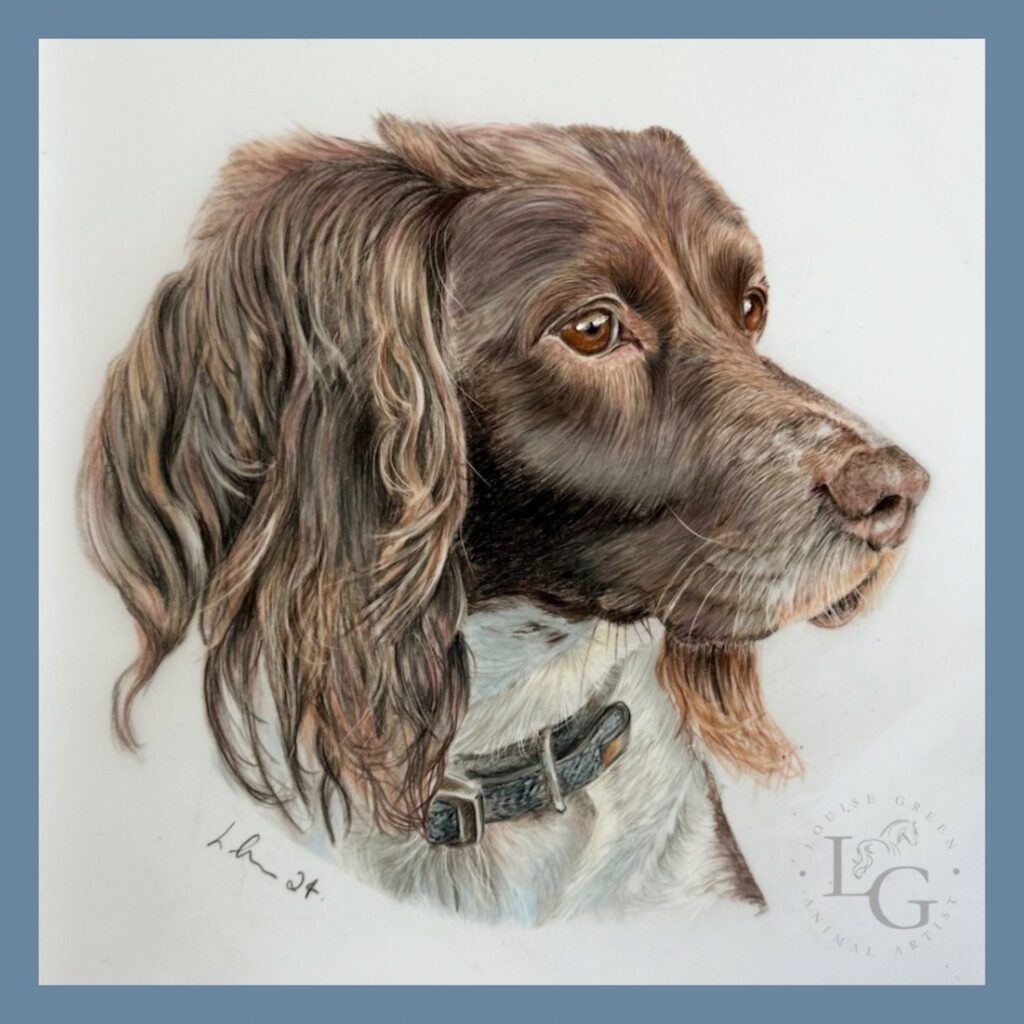
Springer Spaniel Portrait 'Tess'
This beautiful girl really caught my eye. The sunlight in the original photograph was streaming onto her face and she has the most beautiful expression, almost wistfully staring into the distance. I love how the sunlight catches her eyes.
The photo credit goes to Joanne Hepworth.
Sharing the process
Here is a deeper dive into the materials and processes used to create her.
The surface
This portrait was drawn on drafting film. I had practiced a couple of smaller pieces on drafting film to get used to the technique of drawing on it, but this is my first full portrait using this surface.
For those that don’t know, drafting film is a 100% polyester surface that is similar to a thicker version of tracing paper. It is the style of surface usually used to create architects plans and technical drawings. It takes colour pencil beautifully and allows for some techniques that are not possible when drawing on paper.
The drafting film used here is Grafix 0.005 matt both sides to allow laydown of colour on the front and the back.
The colour
I’ve used colour pencils to create this portrait of Tess. I used mostly Faber Castell Polychromos, which are artist grade and lightfast. This is super important as we don’t want colours to fade over time.
I also used Caran D’ache luminance pencils which are softer and have some beautiful earthy shades that are really suitable for drawing animals.
Around 20 different colours were used to create this piece.
Techniques
Drafting film allows for a quicker laydown of colour than on paper, especially compared to a surface like pastelmat, which requires many many layers to build the depth of colour.
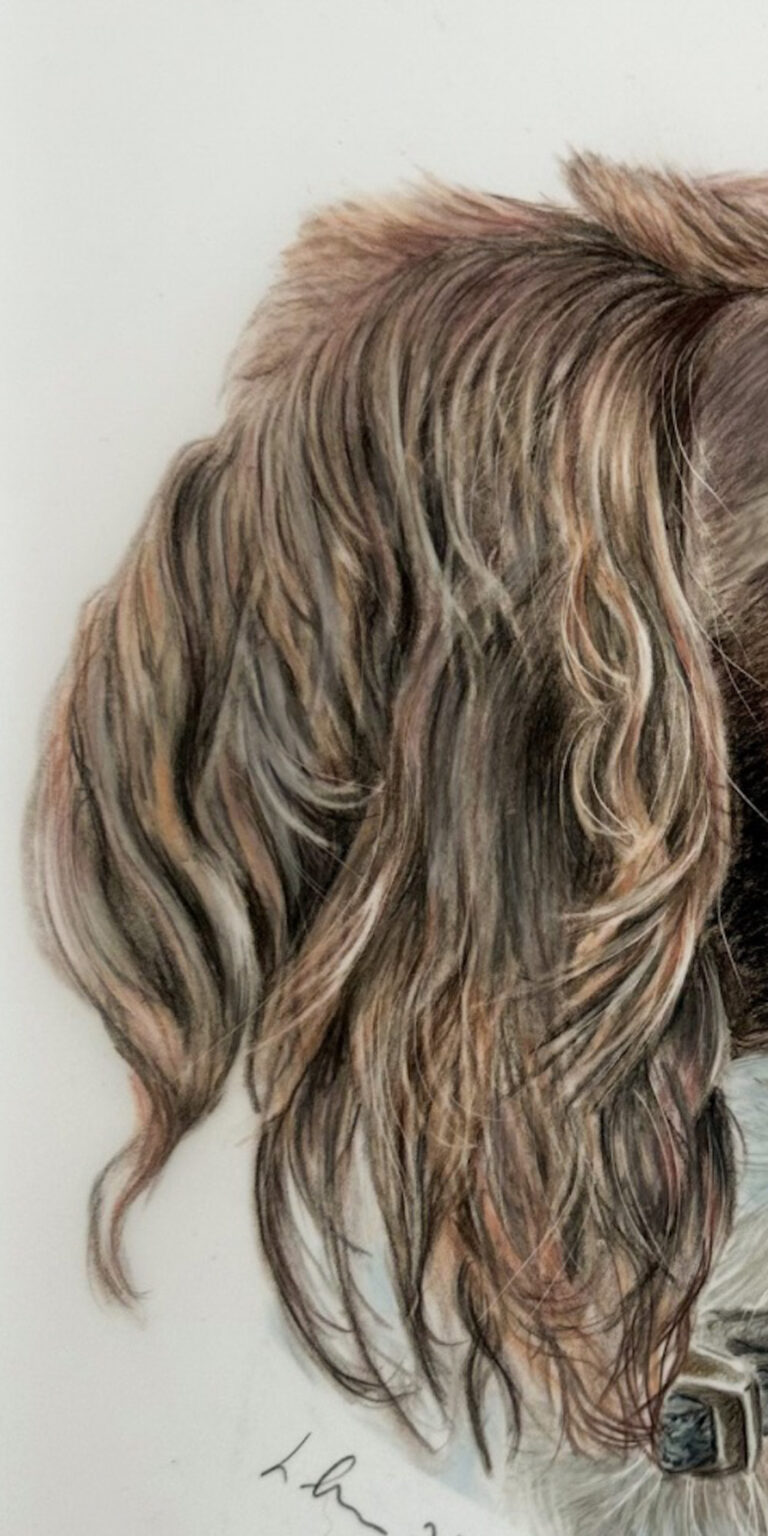
However it is not so easy to blend the colour on drafting film. I have learnt that the real bonus of this surface is the ability to add and remove colour with different tools to create different effects and give a greater depth to the portrait.
I have used a tombow eraser (a thin eraser than is like a propelling pencil) to pull colour back out of different parts of the drawing before working back over the top. This technique proves really useful for the ears to create all those luscious spaniel ear curls. The eraser allows the creation of really beautiful highlights.
Lastly I have used a slice tool (a bit like a craft knife) to remove colour where there are some really fine details such as the fine hairs and whiskers.
As the drafting film has a semi-transparent surface, the final portrait is mounted with a piece of quality white paper behind it to really make the colours pop.
I really hope you have enjoyed reading a little further in depth about how this piece of canine art has been created. If you would like to find out more behind the scenes information about my work and keep up with all my latest news then please subscribe below