Which paper for my colour pencil pet portrait?
From hot pressed paper, to pastelmat and drafting film, there are a huge choice of surfaces that your colour pencil pet portrait can be created on. Not to mention the choice of surface colours too.
This post aims to give you some basic information on some of the most popular types of surfaces that pet portrait artists use and some of the benefits of each, so that you have an overview of the surface that is being discussed with you.
You will find that each artist will have their own preference for the type of surface that they choose to work on. I personally prefer to work on drafting film or pastelmat depending on the subject, as I find that my drawing process suits these two surfaces. However, we are all different, with different styles of drawing and working, so it is important to listen to your artist and be guided by the surface that they suggest. It is of course, always good to ask questions if you are curious as to why a certain surface is being suggested for your pet portrait.
Pastelmat
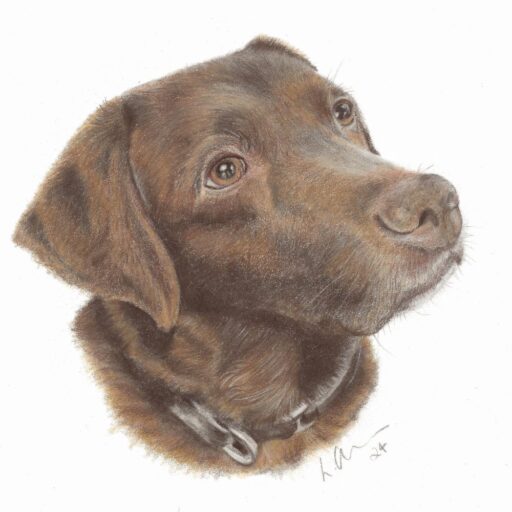
Chocolate Labrador – colour pencils on white pastelmat
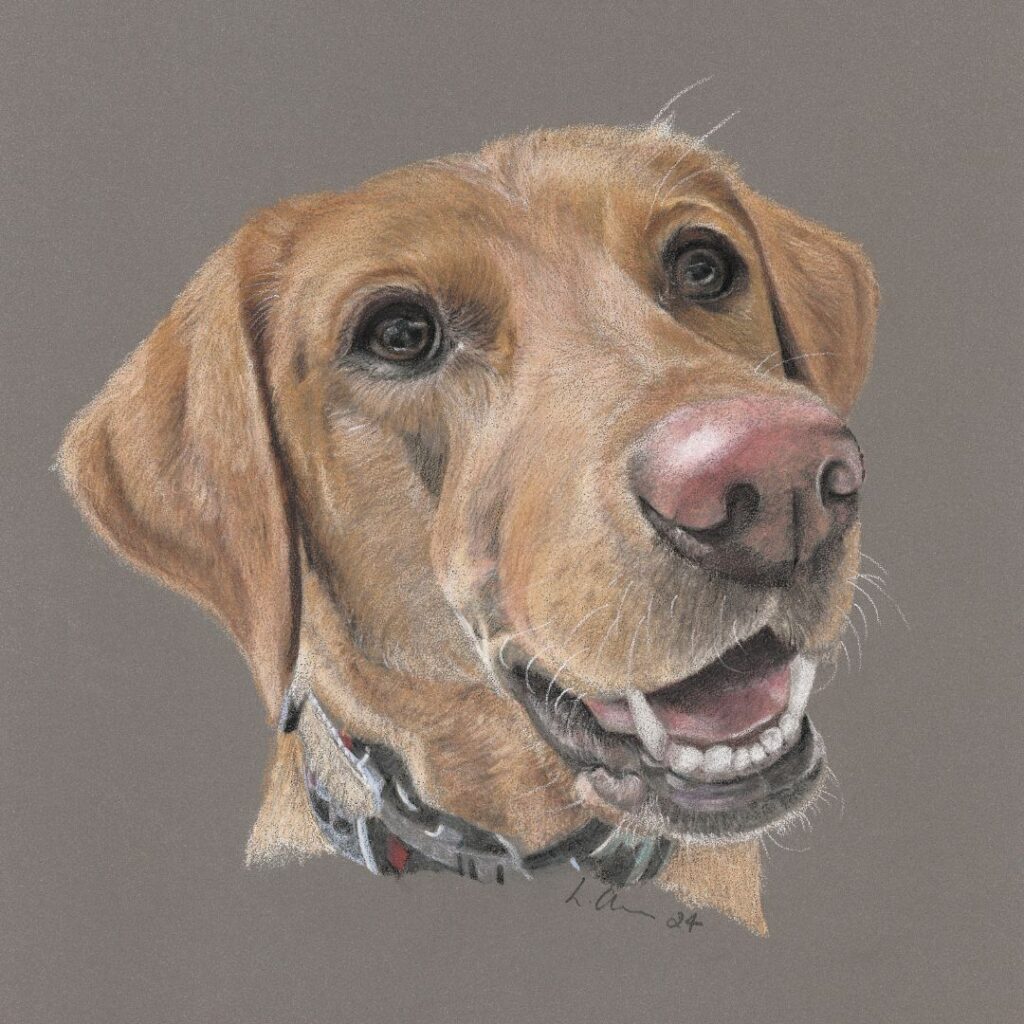
Fox Red Labrador – colour pencils on dark grey pastelmat
Pastelmat is a lovely surface to work on. It has a good ‘tooth’ or slightly rough surface. This means that it can take many layers of colours, giving a rich depth to your pet portrait. I find that the portraits that I create on pastelmat have a lovely soft feel. This is particularly good for animals with short soft fur. You can see how the Labrador ears in the two portraits above look quite velvety.
It is necessary to build up these many layers to ‘fill the tooth’ otherwise the end result can look quite grainy. This can mean that the portrait does take more time to complete.
The biggest bonus that I find with pastelmat is the ability to add a lighter colour over a darker colour. This is very difficult to do on standard drawing paper, meaning that the lighter patches need to be left blank, and it is very difficult to add additional highlights if they are required.
Drafting Film
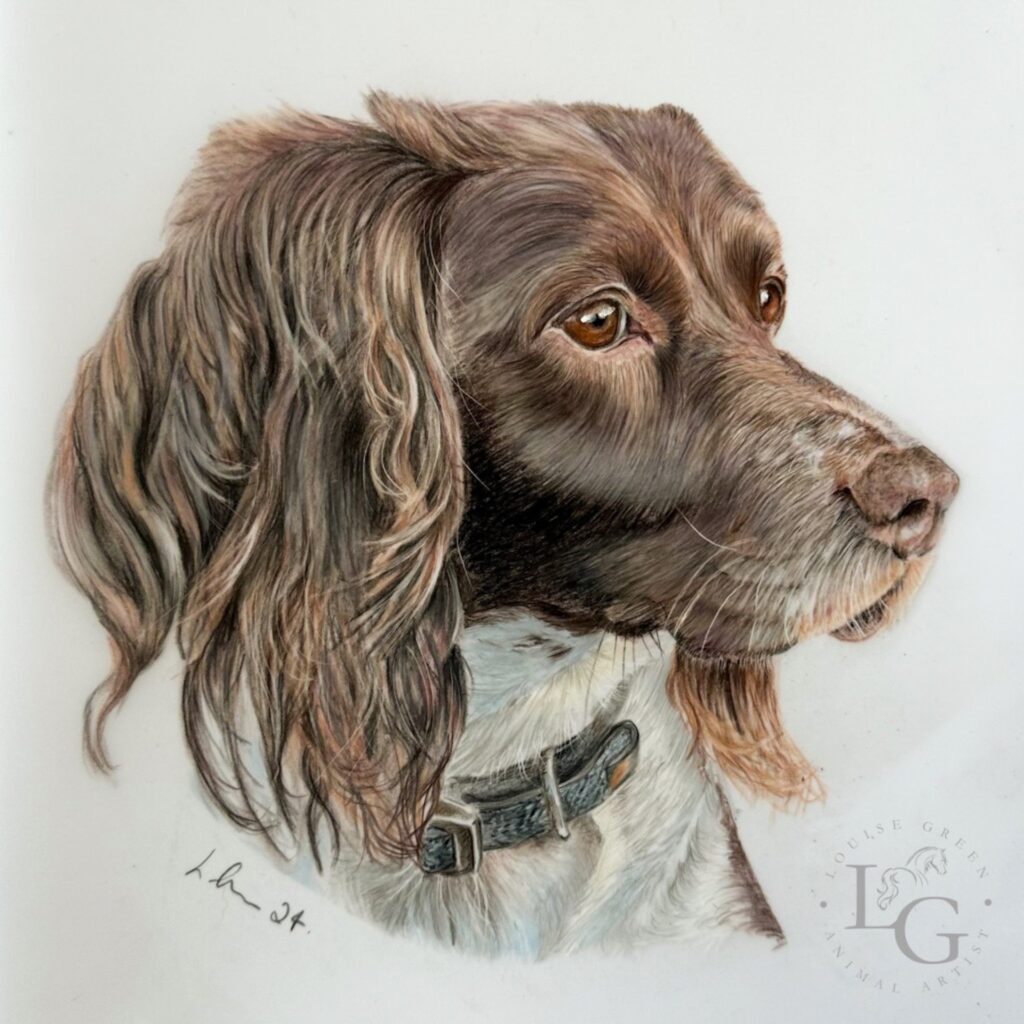
Springer Spaniel – colour pencils on drafting film
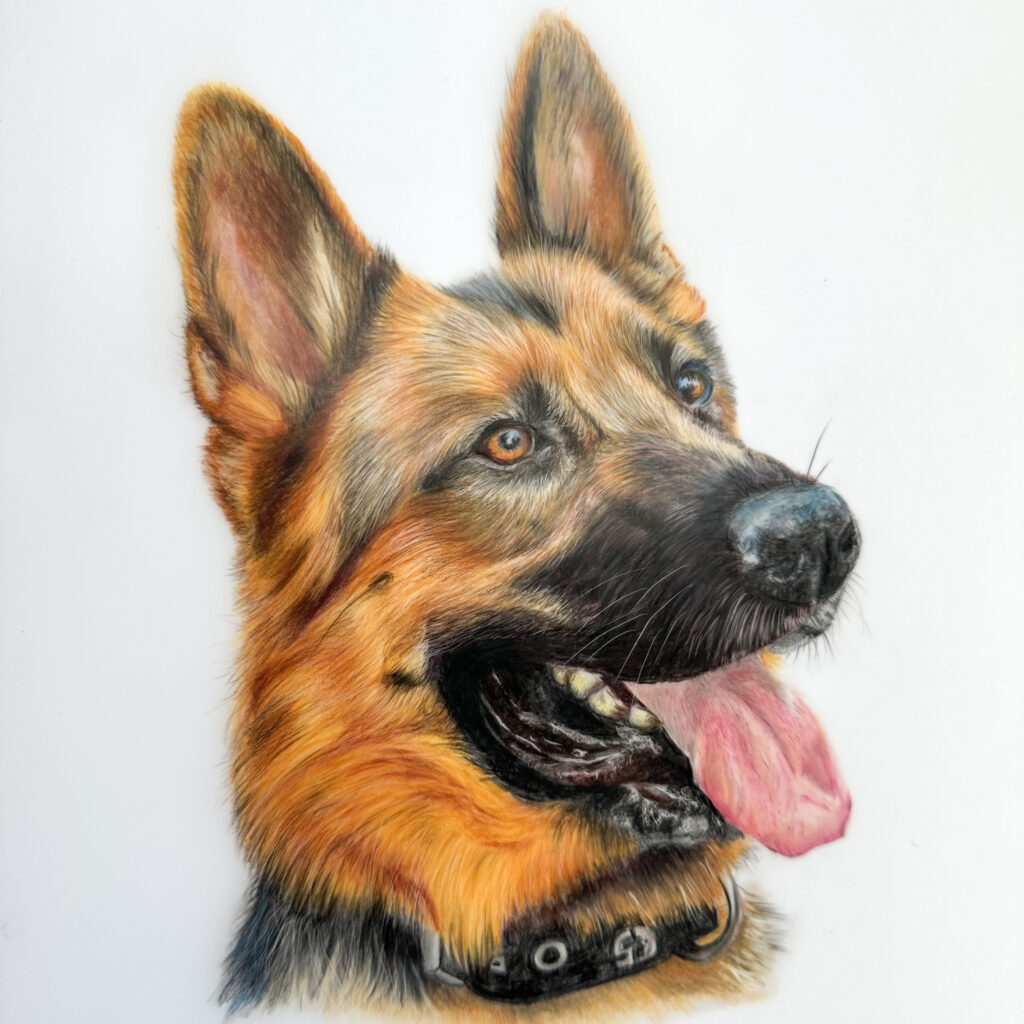
German Shepherd – colour pencils on drafting film
Drafting film is my favourite surface to draw on. Not widely known outside of the artist community, I feel that it is the most versatile of surfaces and allows me to create some of my most realistic portraits.
Drafting film is a semi opaque polyester surface. I use a drafting film that has a matt surface on both sides, which allows me to add additional colour on the back of the portrait to further darken areas if required.
Drafting film is harder to blend colours than either standard drawing paper or pastelmat, but it has a lot of other advantages that I feel outweigh the disadvantage. Colour can be lifted back off the surface using an eraser and reworked to give a depth in highlights. I often use a slice tool to pull out very fine details like whiskers and heavily defined fur. It also has a slight sheen which can accentuate any of the highlights within the portrait.
This surface is great for the sheer amount of different techniques that can be used to give a sharp and realistic drawing and being semi opaque, a choice of backing paper colours can be used to finish the portrait.
Hot pressed drawing paper
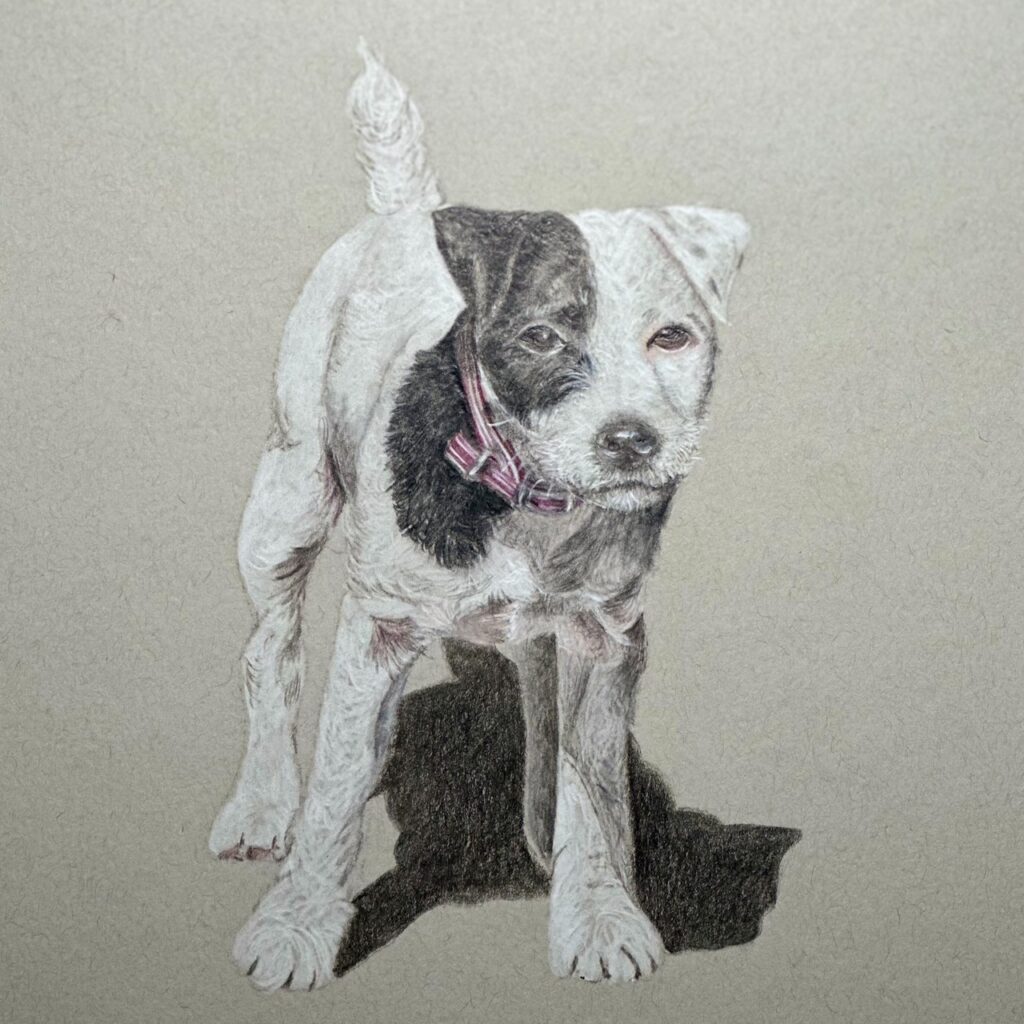
Jack Russell – colour pencils on grey hot pressed paper
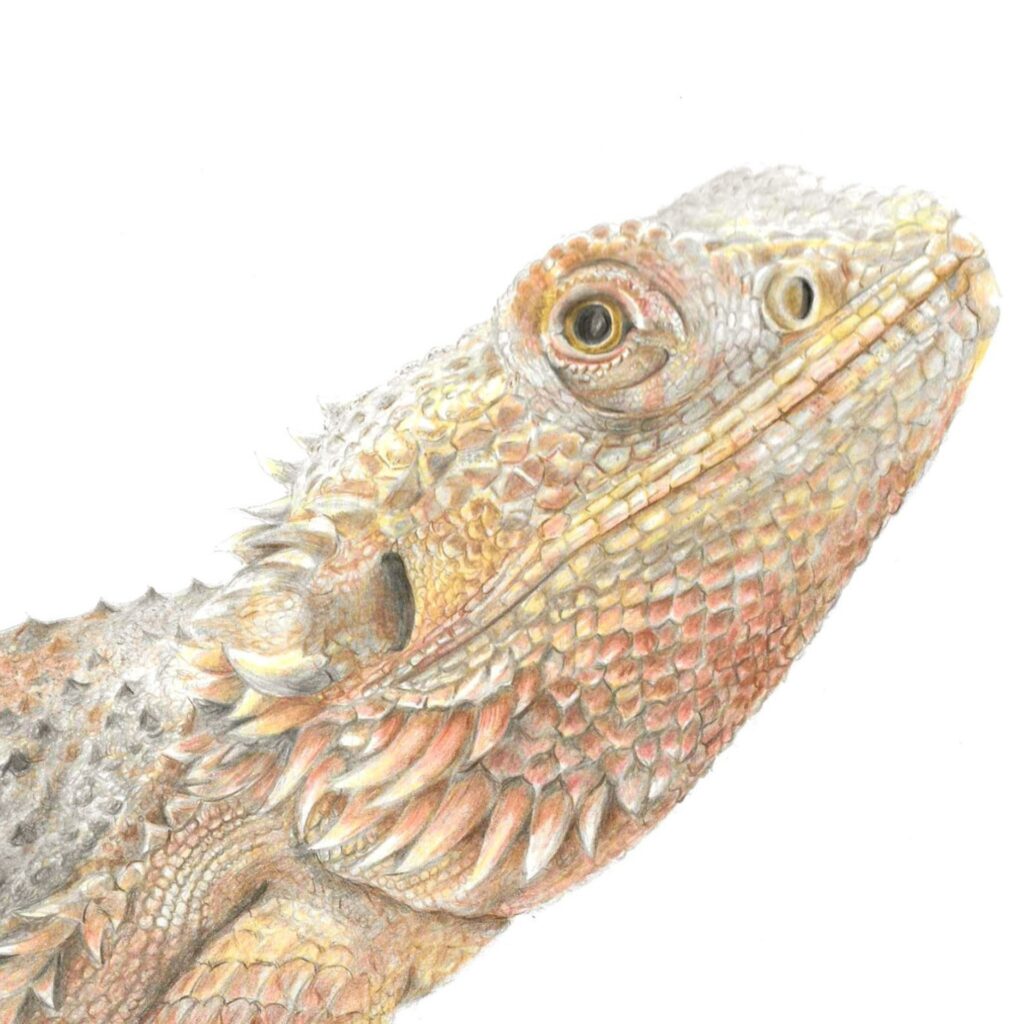
Bearded Dragon – colour pencils on white hot pressed paper
Hot pressed drawing paper is the paper that most people recognise as a drawing surface. It is like watercolour paper but ‘hot pressed’ to create a smoother surface. Very similar to standard cartridge drawing paper.
This paper comes in a vast array of colours.
There is a bit of a ‘tooth’ to this surface, but nothing like pastelmat, so it is able to take far less layers of colour and it is almost impossible to add a light colour on top of dark without the colours mixing to create a muddy effect.
It is possible to get a smooth, almost painted look by using solvent over the top of the base layers and I have used this paper in a lot of my wildlife drawings, but it is not very forgiving and the highlights and light areas need to be planned very carefully before starting to draw. It is also very difficult to remove any mistakes cleanly as the pencil colour tends to stick to the paper well, unless very lightly applied.
Surface colour
It is important to consider the surface colour of your portrait, as very different effects can be achieved with the same portrait but on a different background colour.
One example would be an animal with white fur.
It is possible to create a white fur animal on white paper, as the fur reflects many colours and these can be subtly included to create a small contrast with the background. Highlights on the animal can fade into the paper so the whole portrait has a subtle dreamy feel.
Alternatively, the same white animal can be drawn on dark paper so that there is a large contrast between the two, allowing the animal to pop against the background.
Similarly, a very dark animal drawn on white paper will pop against the background, but by using a dark background, a very artistic look can be created where a lot of the animal fades into the paper and the mid tones and highlights are the main feature of the drawing.
Animals that are not very dark or very light work well on most papers, though the most popular would be a standard white paper to give full focus to the portrait.
I will create another post later on with further examples and a deeper look at the variations that can be achieved using different colour paper.
Sign up to my mailing list below to be first to hear about any future posts.
I hope that this post has given you a bit of a background of different surface types and how they work with your portrait and work for the artist.
As I stated at the beginning. Don’t be afraid to ask questions of the artist as to why they are suggesting a certain surface and hopefully the information I have included will be useful for you to imagine how your finished portrait may look.
